I thought this ad on an aerobridge recently was quite pertinent given the current tariff situation of the United States administration…

I thought this ad on an aerobridge recently was quite pertinent given the current tariff situation of the United States administration…
This blog post is part of a series about my road trip around South/East Australia in an electric vehicle. Read other posts using the same tag.
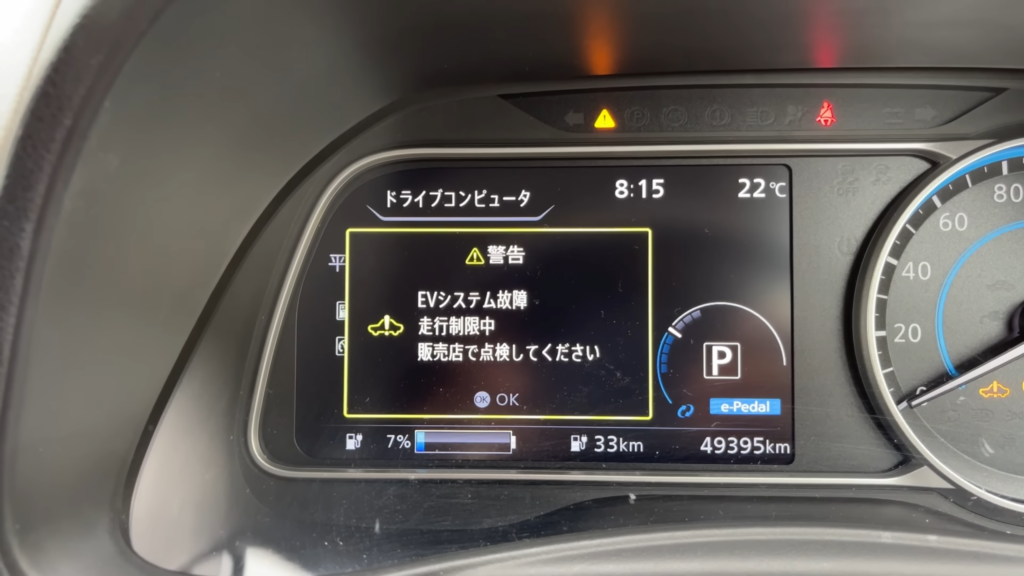
So to recap from the last post – this is basically what I saw:
This blog post is part of a series about my road trip around South/East Australia in an electric vehicle. Read other posts using the same tag.
Returning back to the town city that I stayed in for my studies, I arrived in Canberra from the south and opted to stop over at the Royal Australian Mint. Not only did they have a bank of EV chargers, but I’m embarrased to say that I had not once visited it in the four years I was in the capital city. Lucky that I did so then – my visit was just before the visitor centre was about to undergo an extended closure for renovations.
This blog post is part of a series about my road trip around South/East Australia in an electric vehicle. Read other posts using the same tag.
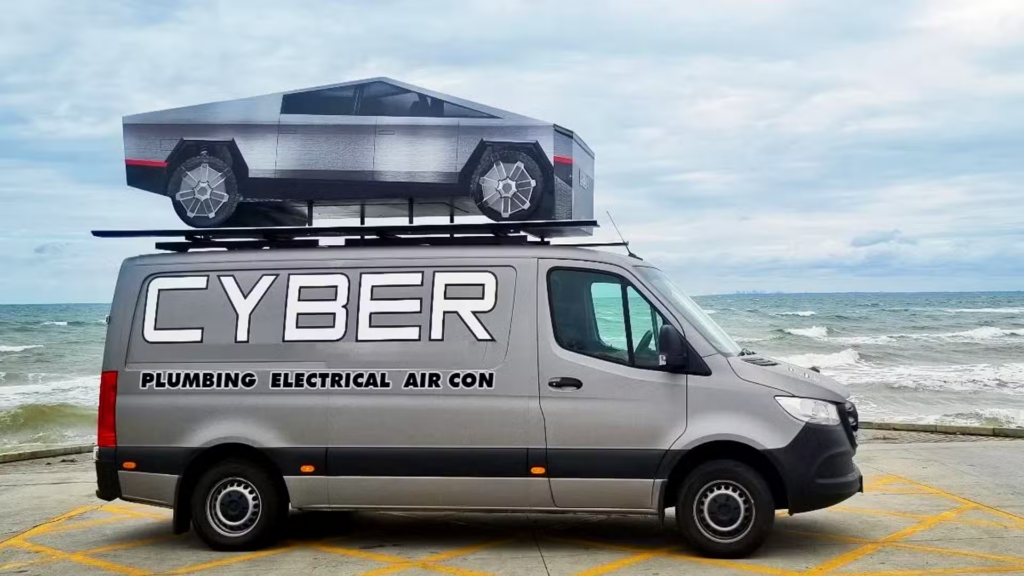
It was a bit chilly on an early morning driving out of Adelaide, where upon going up and over the hills I had to double take as I passed this “Cybertruck”…
Living in subtropical South East Queensland, you get used to major weather events like heavy rain, flooding, and strong winds happening on a semi-regular basis.
So when you hear that a cyclone’s formed off the coast some distance away almost two weeks ago – at first you’d be inclined to dismiss the severity of it because few cyclones make it this far south.
Well… we’re in for a big one this week with Tropical Cyclone Alfred wandering down the coast for a while, but now making a cruel sharp westward turn straight for us!
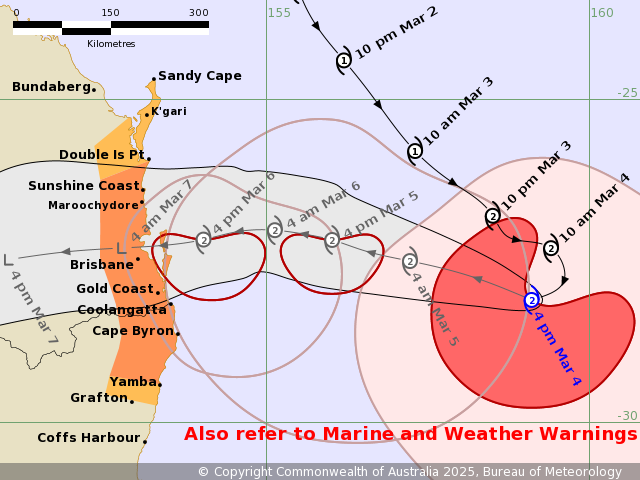
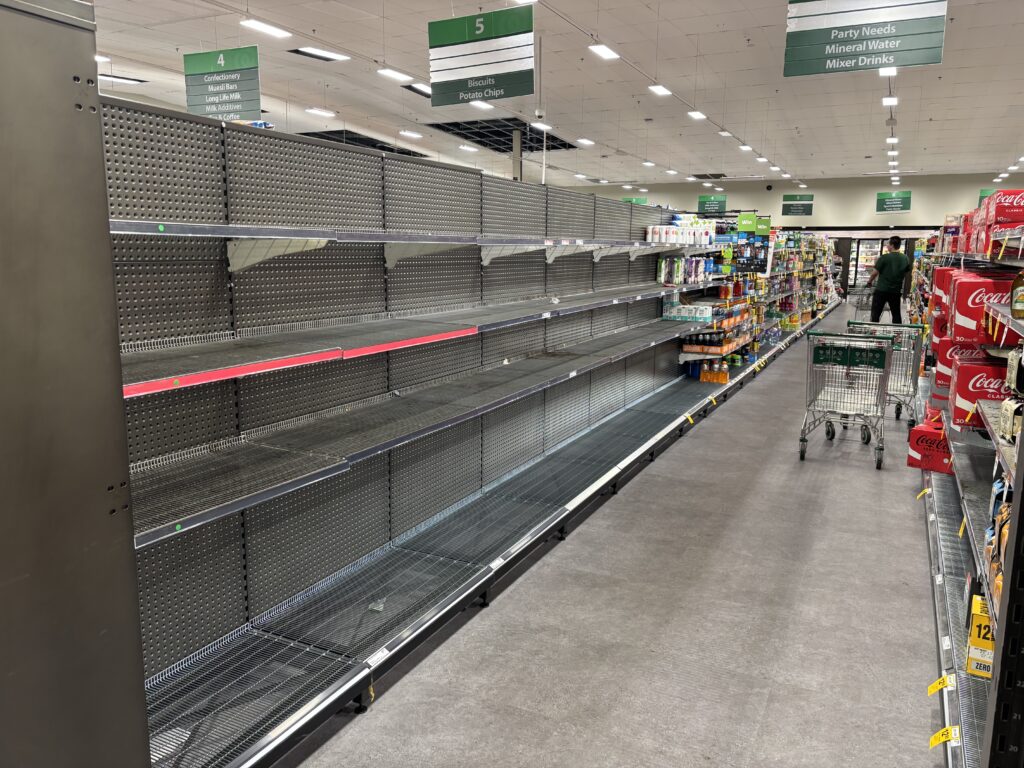
The last major cyclone to make landfall around South East Queensland was around 50 years ago, so naturally the population here isn’t used to it. Mild panic buying of water, batteries, even toilet paper (bringing back memories of COVID…) has set in, but otherwise things are orderly at the moment.
We’ve prepped my place a number of days prior – while we’re not at risk of direct flooding we are on a sloping plot so we put in some improved drainage and got some sandbags which has been fortuitous because apparently sandbag queues have gotten quite long over the last 48 hours and some places can’t keep up with demand.
Neighbours opposite us have actually completely cut down some ~4-storey-tall trees down, probably due to the high risk of flattening nearby houses and electricity infrastructure – which goes to show how seriously this is being taken.
I personally haven’t experienced a cyclone myself, so fingers crossed we get to the other side unscathed!
Stay safe everyone!
This blog post is part of a series about my road trip around South/East Australia in an electric vehicle. Read other posts using the same tag.
I dropped my keys off and checked out at 6:30am to find my car covered in a light frost (!) and double checked the charge on my car (98% – good…) before setting off to continue my westward journey which should get me just across the border into South Australia before the end of the day.
Continue reading Shaking like a Leaf (IV): Headin’ Down SouthReviewing my goal last year of getting back into blogging – it didn’t turn out that way mainly because of two reasons: work; and the WordPress debacle.
I had taken the first half of 2024 off from everything and was overseas for a fair bit without my computer, but I got back into the workforce in the latter half which chewed up a fair bit of time initially. Then the WordPress dispute kicked off around September. I won’t go into much about the dispute here, but since this blog runs on WordPress, I paused blogging while looking for an alternative but by the end of the year didn’t end up finding something as well run and integrated as WordPress.
As a result, I’ll stick with WordPress for now; I don’t expect it to disappear as such, but the legal mess isn’t exactly confidence inspiriring for the long term. I might still end up migrating the blog at some point – we’ll see how it goes.
This year’s resolution? I haven’t thought of one properly to be honest. Maybe “more in-person connections”? This does make me sound like I’ve always been some complete anti-social (I promise I’m just shy!) – but during my travels through the road trip and trips overseas last year, I had actually ended up stopping and talking to a larger number and more diverse set of people than I have in a long time.
It made me reflect on what my post-uni days have been like and while I’ve made a point of keeping in touch with ex-colleagues – of which I’ve been in a lot of catch-ups with in 2024 – my outside-of-work group has remained mainly static. I don’t expect to necessarily build more close friendships; going back to my trips last year – what I liked were the interactions themselves and sitting down to hear other people’s stories. Maybe it’s just me reflecting on the lack of “worldly” experiences in my 20s.
The EV road trip series will resume shortly – the next post is mostly drafted at this point. I do hope to be in regular blogging mode for 2025 and beyond!
This blog post is part of a series about my road trip around South/East Australia in an electric vehicle. Read other posts using the same tag.
My Sydney visit came to an end, and it was time for me to start the inland part of my trip.
After a brief charge just short of the Blue Mountains, I headed along the winding highway to Katoomba to see if I could catch a look at the famous Three Sisters sandstone formations…
Continue reading Shaking like a Leaf (III): Hitting turbulenceThis blog post is part of a series about my road trip around South/East Australia in an electric vehicle. Read other posts using the same tag.
Even after the long day yesterday, I was already up at 6, with the warm sun beaming through the windows.
I had already charged the car to 90% overnight, but because there’s free charging I thought I might as well get the car charged to 100% before heading out to Sydney – saves me a bit of cash and also helps get my car further with the hilly terrain expected along the way. Two of the four spots were already occupied at the charging station near the wharf by 7:30am – all chargers were occupied soon after, which wasn’t surprising considering it didn’t cost anything to charge here.
Continue reading Shaking like a Leaf (II): Cities, big and smallThis blog post is part of a series about my road trip around South/East Australia in an electric vehicle. Read other posts using the same tag.
The first day involved travelling from Brisbane to Newcastle, which is around 780km. This was going to be longest I would be driving in a single day – partly because I had planned the road trip a little late and needed to fit around some schedules to catch up with people along the way. I probably would have stopped to stay in places like Coffs Harbour along the way if I hadn’t stuffed up the timing of the initial part of the trip.

For general planning I used the “A Better Route Planner” app (ABRP) which suggested that it would take around 12 hours or so all up to cover the distance with some of the stopovers included. This app automatically routes travel to include charging stations, adds charge time to the total trip time, and you can even customise things like the remaining level of charge you want when arriving, and so on. I’ll pop comments about ABRP throughout this series, but overall I have found it pretty good and mostly lined up with my manual planning before I discovered the app, though its UI has quite a few quirks which can be frustrating at times.
For this leg I gave myself another 2 hours above the estimate, and planned for 14 hours in total with around 9 hours on the road. That would mean I would start at 3am AEST and arrive around 6pm AEDT. An early start, but not something I haven’t done before in previous travels.
Continue reading Shaking like a Leaf (I): From dawn till dusk